

Set up API keys and webhooks
Also known as: API, API keys, webhooks, integrations.
API keys give an integration programmatic access to your account’s read APIs, and webhooks push event notifications to your own HTTPS endpoints. Together they let you connect Belrald Assets to the rest of your systems.
Everything lives in Settings → API & Webhooks, across two tabs: API keys and Webhooks. Owners and admins can create and manage both; managers see the page read-only, marked with a Read-only chip. If the feature is not turned on for your account, the page shows a card explaining that Public API isn’t enabled — contact your administrator to turn it on.
Create an API key
Section titled “Create an API key”- Open the API keys tab and select New API key.
- Name — give the key a recognisable label, such as
CI pipeline(120 characters or fewer). - Environment — choose Live or Test. This is set at creation and can’t be changed later.
- Scopes — tick the permissions the key needs. Only read:workorders and read:assets map to a live endpoint today and are ticked by default. The other four scopes are badged no endpoint yet — you can grant them, but they do nothing until the public write API ships.
- Select Create key.
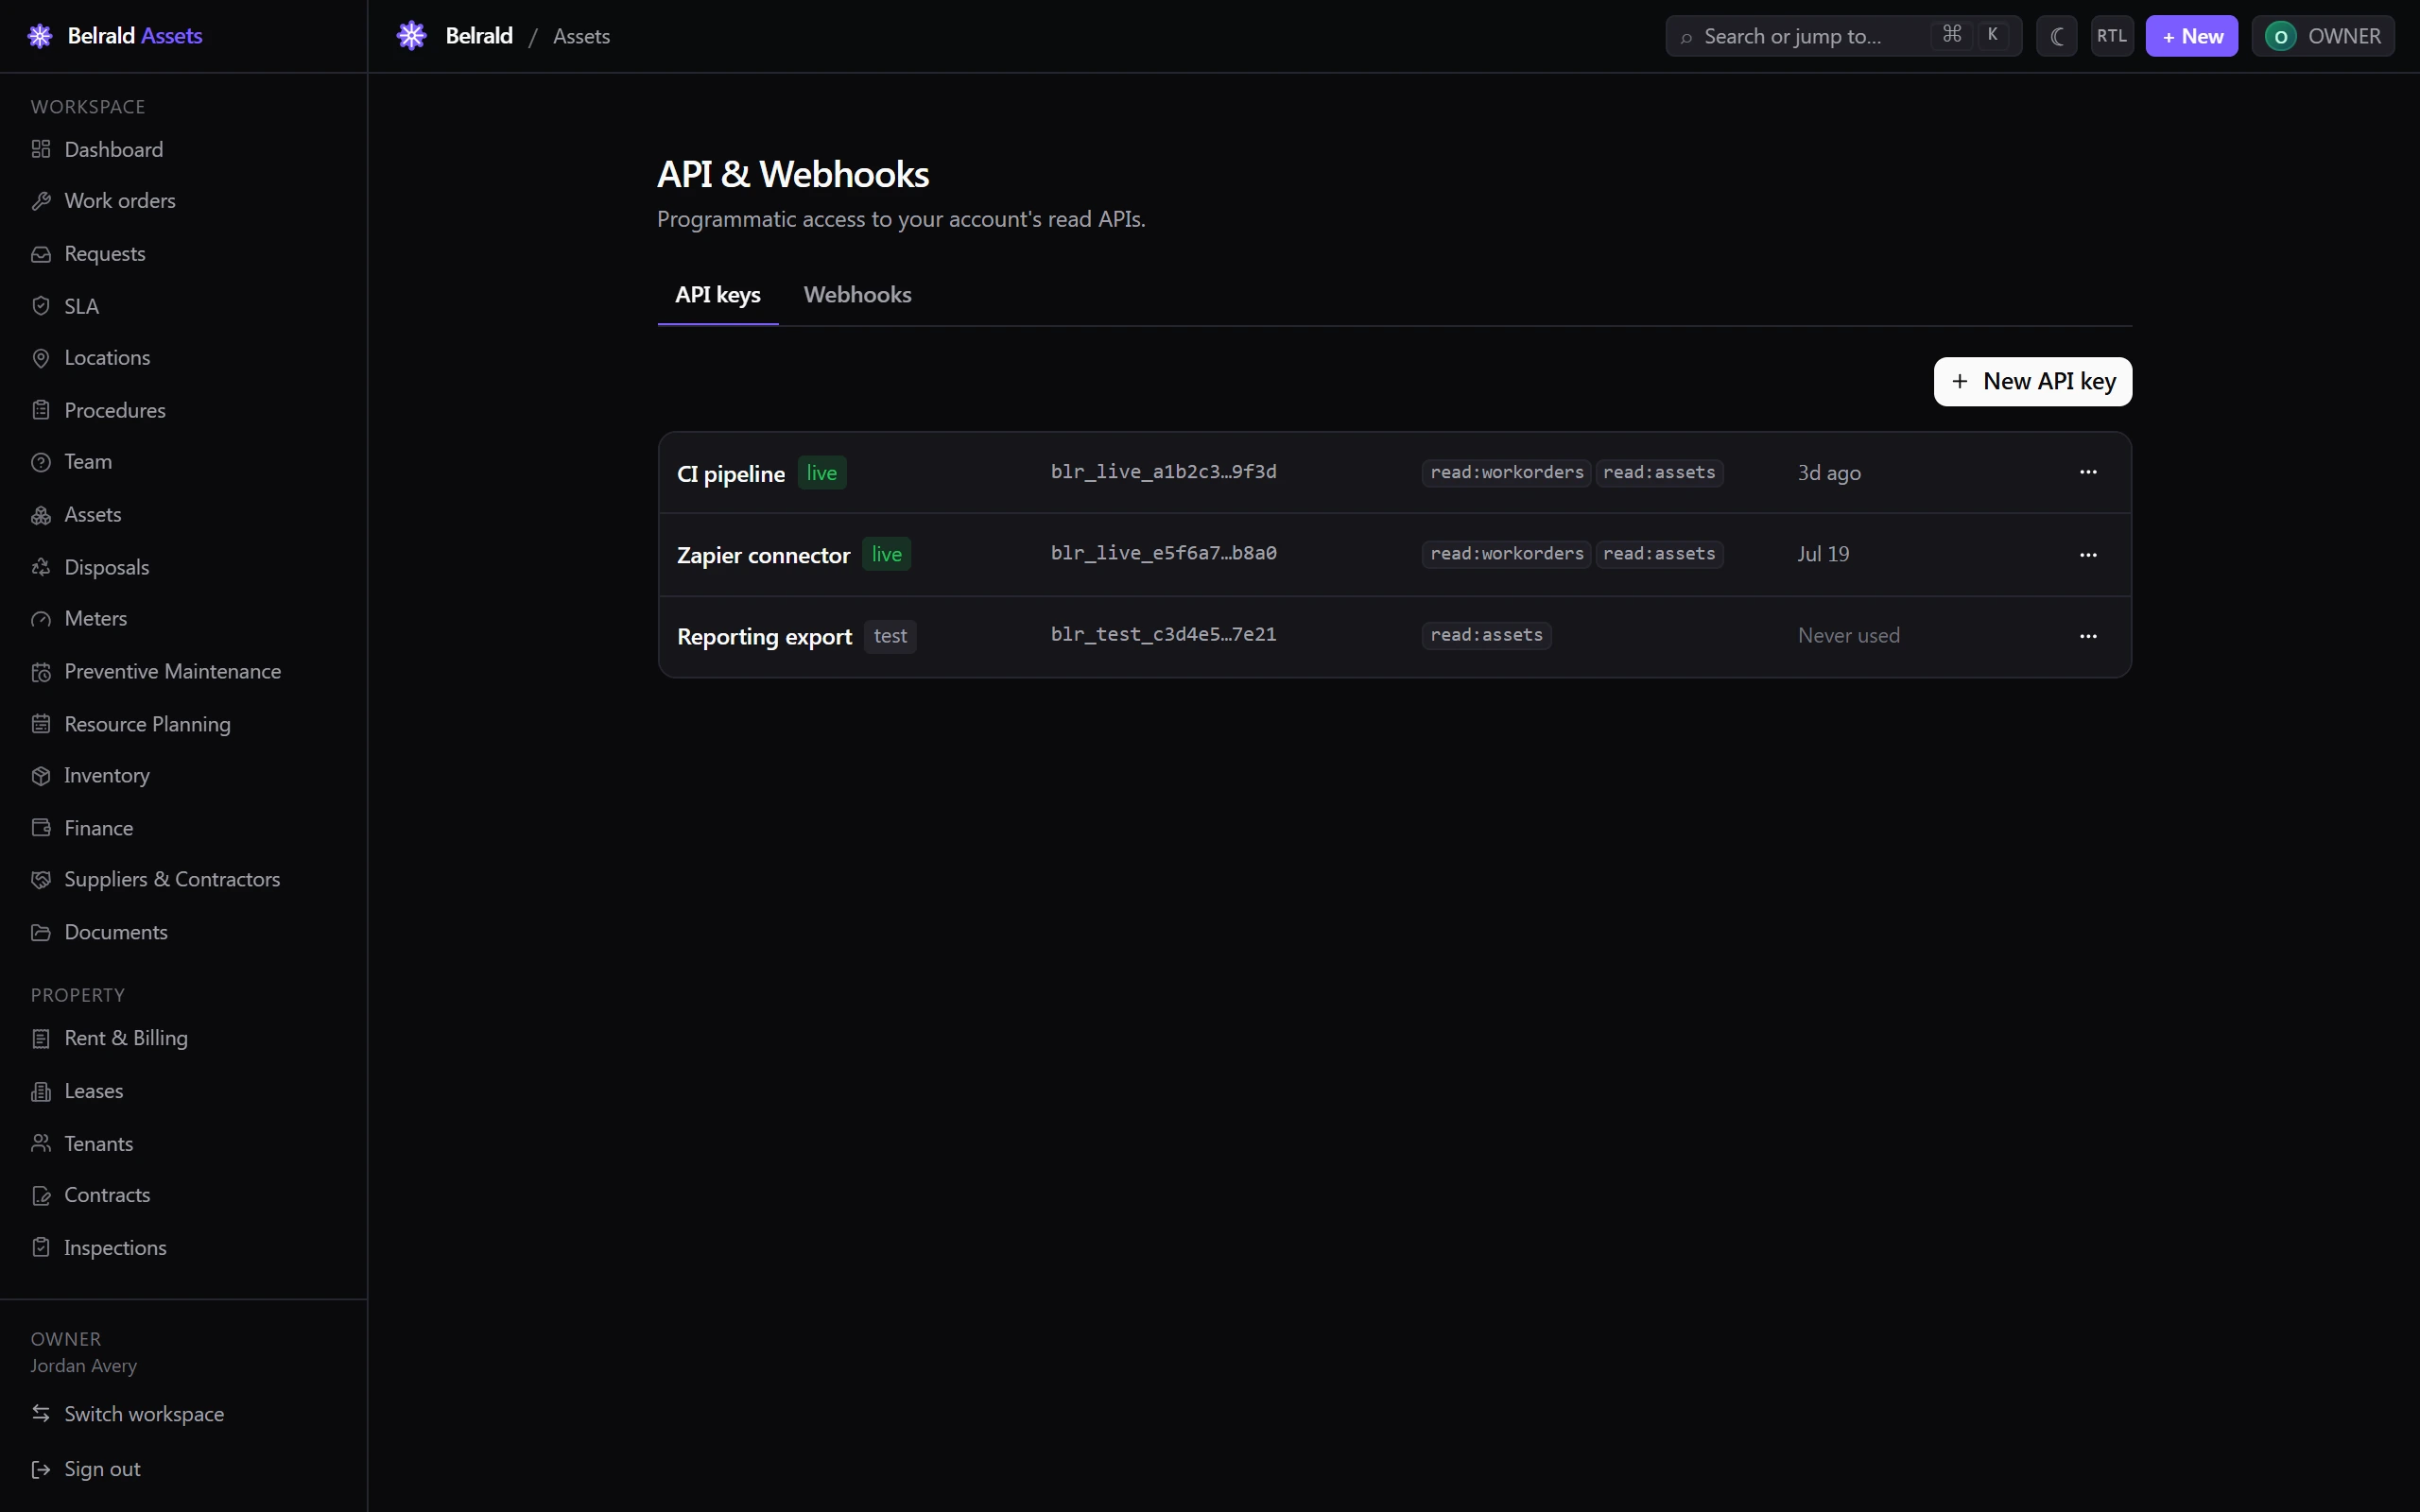
The key then appears in the list showing its name, an environment pill, the
masked key (prefix…last4 — never the full secret), its scopes and when it was
last used (Never used until an integration calls the API with it).
Rotate or revoke a key
Section titled “Rotate or revoke a key”Open the ⋯ menu on a key’s row for its actions.
- Edit changes the key’s name and scopes. The environment stays fixed.
- Rotate generates a new secret, shown once. Your previous secret keeps working for 24 hours, so you can update your integration without downtime.
- Revoke disables the key. Any integration using it stops working immediately, and this can’t be undone — the button asks you to click again to confirm.
Create a webhook
Section titled “Create a webhook”- Open the Webhooks tab and select New webhook.
- Name — a recognisable label, such as
Ops relay. - Endpoint URL — the destination for deliveries. It must be a public HTTPS URL.
- Events — pick the events to subscribe to from the grouped, searchable list (Work orders, Assets, Maintenance requests, Preventive maintenance, Meters, Contracts, Inventory, Quotes, SLA, Certifications, Payments and Workflow). Select at least one.
- Select Create webhook.
The create dialog also carries a collapsible Verify deliveries recipe you can copy. The webhook then appears in the list with a state dot, its URL, an events count, the last delivery time with a success or failure marker, and a state pill of Active, Disabled or Paused.
Verify each delivery
Section titled “Verify each delivery”Every delivery carries an X-Belrald-Signature header of the form
t=<unix>,v1=<hmac_sha256_hex>. Before you trust a payload:
- Read the timestamp
tand signaturev1from the header. - Build the signed payload as
{t}.{rawBody}— the timestamp, a dot, then the exact raw request body. - Compute
hmac_sha256(signing_secret, signed_payload)and compare it againstv1using a constant-time comparison.
The request body is JSON of the shape { id, type, occurredAt, data }.
Manage and monitor a webhook
Section titled “Manage and monitor a webhook”Open the ⋯ menu on a webhook’s row for its actions.
- Edit changes the name, URL and events, and — on an existing webhook — toggles it Active.
- Send test queues a synthetic test delivery. Check the delivery log to see the result; there is no inline response.
- Delivery log shows the 100 most recent deliveries, newest first. Each row gives the event type, the attempt count, an HTTP status, the response snippet and a status of pending, success, failed or exhausted. The log is read-only.
- Rotate secret issues a new signing secret, shown once.
- Enable / Disable turns deliveries on or off.
- Delete removes the webhook. It stops receiving events, and this can’t be undone.
Was this page helpful?
Thanks — your feedback helps us improve these guides.