

Track and remediate a vulnerability
The vulnerability register tracks security findings against your assets — the
CVEs a scanner reports, the advisories a vendor publishes, the weaknesses you
record by hand — and drives each one to a fix. Every finding gets a reference
like VLN-0001 and carries its severity, remediation and patch history with it.
Find it under Governance → Vulnerabilities. The desk has two tabs: Register, the list of findings, and Posture, the PCI-oriented summary.
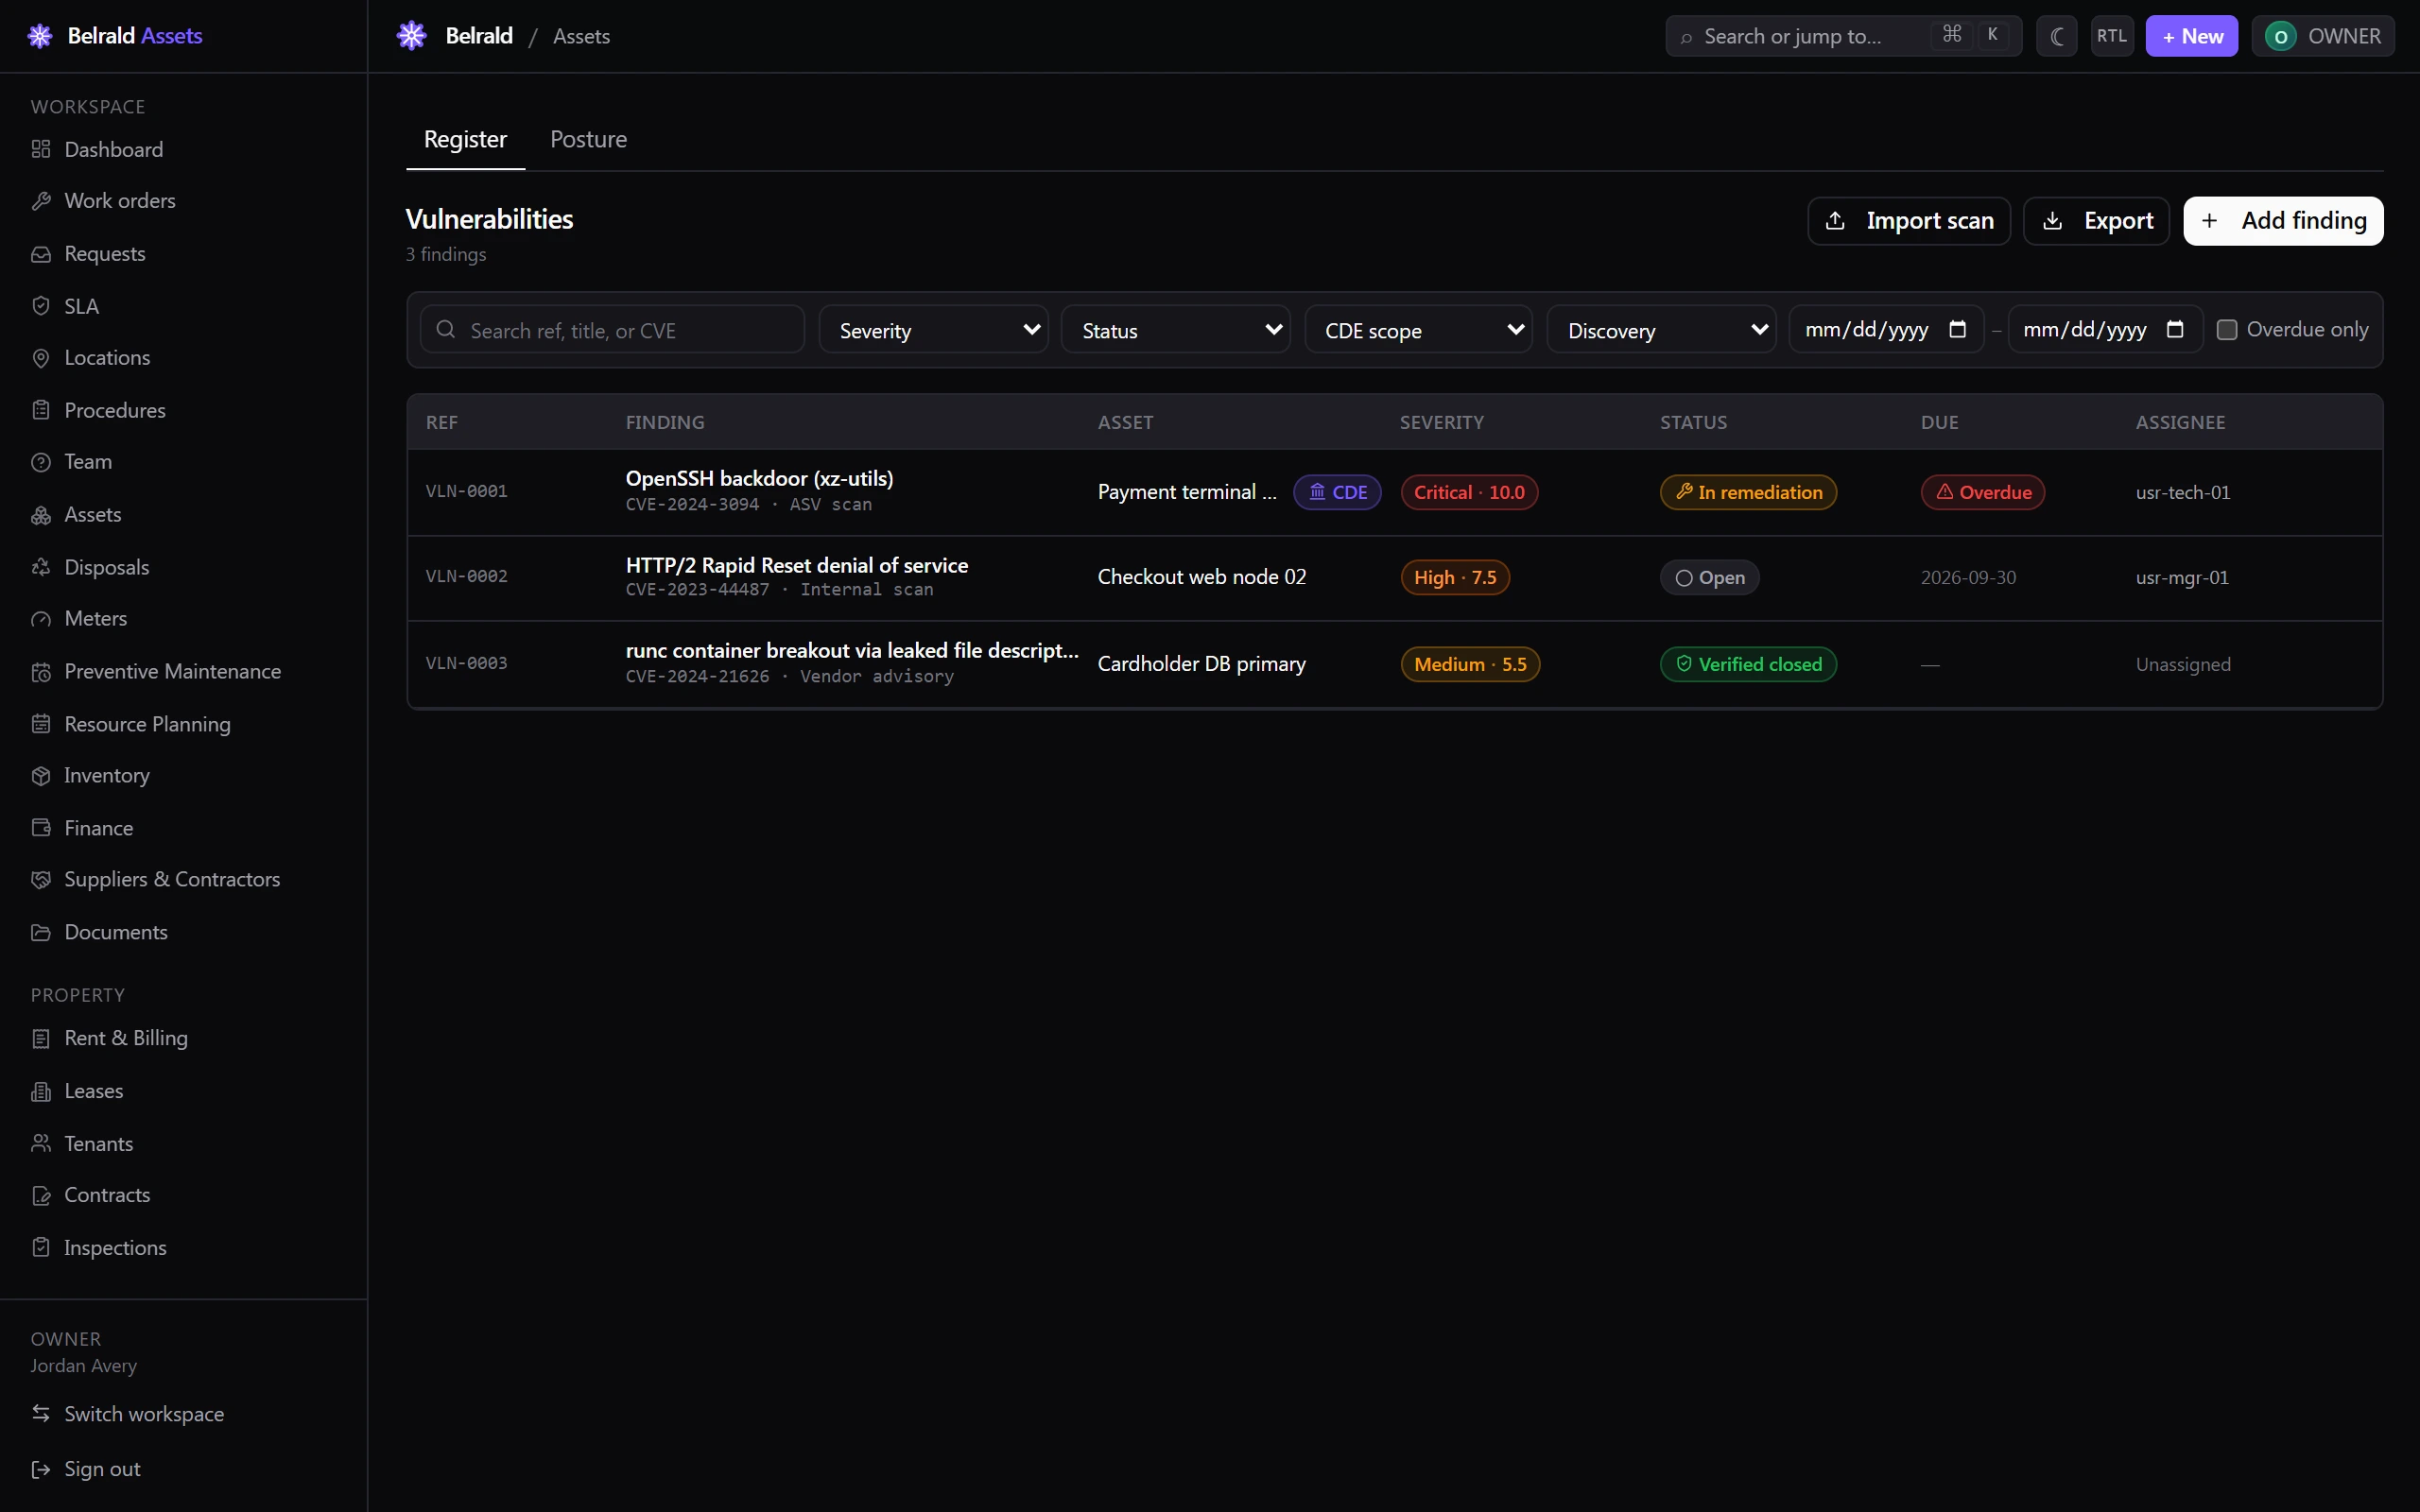
Add a finding
Section titled “Add a finding”- On Register, select Add finding.
- Choose the Affected asset — CDE-scoped assets get stricter remediation SLAs.
- Enter a Title for the finding.
- Set the Discovery source — ASV scan, Internal scan, Vendor advisory, Manual or Threat feed.
- Choose the Severity — Critical, High, Medium, Low or Informational.
- Add the CVE ID if there is one — it must match
CVE-YYYY-NNNN. - Record the CVSS score (0–10) and vector if you have them. The form shows the severity band the score falls into.
- Add a Description, Labels and Attachments.
- Save the finding.
Members can file a finding by hand. The affected asset and discovery source are fixed once saved — edits cover the title, severity, CVE, CVSS, description, labels and attachments.
Import a scanner export
Section titled “Import a scanner export”Bring findings in in bulk from Import scan on the Register.
- Choose the scanner vendor — Tenable, Qualys, Nessus or Rapid7.
- Choose the discovery source — Internal scan (satisfies PCI Req 11.3.1) or ASV scan (11.3.2). Only these two scan sources can be imported.
- Optionally link an audit event.
- Add the rows — upload a scanner CSV or paste rows. Each row needs an asset key and either a CVE or a title.
- Review the parsed rows and Import.
Re-importing updates existing open findings on the same asset and CVE, never
resurrects a closed finding, and creates new VLN-#### findings for new rows.
An import of more than 500 rows runs in the background and notifies you when it
finishes.
CDE scope and remediation SLAs
Section titled “CDE scope and remediation SLAs”When an affected asset sits in the cardholder-data environment, the finding is marked CDE and stricter remediation deadlines apply. Scope is captured at discovery — changing the asset’s CDE scope later won’t move an existing record.
The server sets the remediation due date from the severity and CDE scope:
| Severity | CDE asset | Non-CDE asset |
|---|---|---|
| Critical | 1 month | 2 months |
| High | 3 months | 6 months |
| Medium | 6 months | 12 months |
| Low | 12 months | Best-effort |
| Informational | Best-effort | Best-effort |
Best-effort findings carry no due date and never count as overdue.
Assign and remediate
Section titled “Assign and remediate”Open a finding and Assign it to a team member so the work has an owner.
Select Remediate to record the patch. This creates a patch record and moves the finding to In remediation. Record the:
- Patch identifier and Patch version
- Applied via — Manual, MDM push or Automated update
- Applied at date
- Confirmation of a pre-apply backup (required)
- Optional notes
Each remediation appears in the finding’s Patch history. Technicians can record remediations — they are the people applying the patches.
Verify and close
Section titled “Verify and close”Select Verify & close to confirm the fix. Add verification notes and a reason. Two guardrails apply:
- Segregation of duties — the verifier can’t be the person assigned to remediate the finding.
- CDE authority — only an owner, admin or manager can verify-close a CDE-scoped finding.
A verified finding moves to Verified closed.
Accept the risk
Section titled “Accept the risk”If a finding can’t be fixed but the residual risk is acceptable, select Accept risk and give a reason — PCI-DSS requires one, so it is mandatory. Only an owner, admin or manager can accept risk. The finding moves to Risk accepted and records who accepted it and when.
Change status by hand
Section titled “Change status by hand”Change status moves a finding between states directly, with an optional reason. The backend validates the transition, so a move that isn’t allowed is rejected — refresh and retry if that happens.
The states are Open, In remediation, Remediated, Verified closed, Risk accepted and False positive. A finding normally runs Open → In remediation → Remediated → Verified closed; Risk accepted and False positive are the off-ramps.
When a finding goes overdue
Section titled “When a finding goes overdue”A finding is overdue when its remediation due date has passed and it isn’t yet closed. Overdue findings are flagged in the register and gather in the Posture queue.
When a finding goes overdue, a non-conformity is raised automatically and linked to it — a banner on the finding deep-links to the NCR so the corrective-action trail stays joined up.
Posture and scan evidence
Section titled “Posture and scan evidence”The Posture tab summarises the register for PCI-DSS Req 6.3.3 / 11.3:
- Open by severity, split by CDE and non-CDE scope.
- Overdue remediation rate — how many open findings are past their SLA.
- Quarterly internal scan — whether an internal scan has run this quarter against your CDE assets (PCI Req 11.3.1).
- The Overdue findings queue.
Export
Section titled “Export”Export downloads the register as a CSV, honouring the filters you have set — search, severity, status, CDE scope, discovery source, assignee, asset, overdue and discovery-date range. Viewers can export for audit submissions.
Was this page helpful?
Thanks — your feedback helps us improve these guides.