

Manage parts and inventory
Also known as: parts, inventory, spare parts, stock.
Inventory keeps a catalogue of the spare parts you stock, tracks how many you have on hand and where, and lets technicians pull parts onto a work order so the cost lands against the job.
Browse the parts catalogue
Section titled “Browse the parts catalogue”- In the sidebar, select Inventory. The desk opens on the Parts tab.
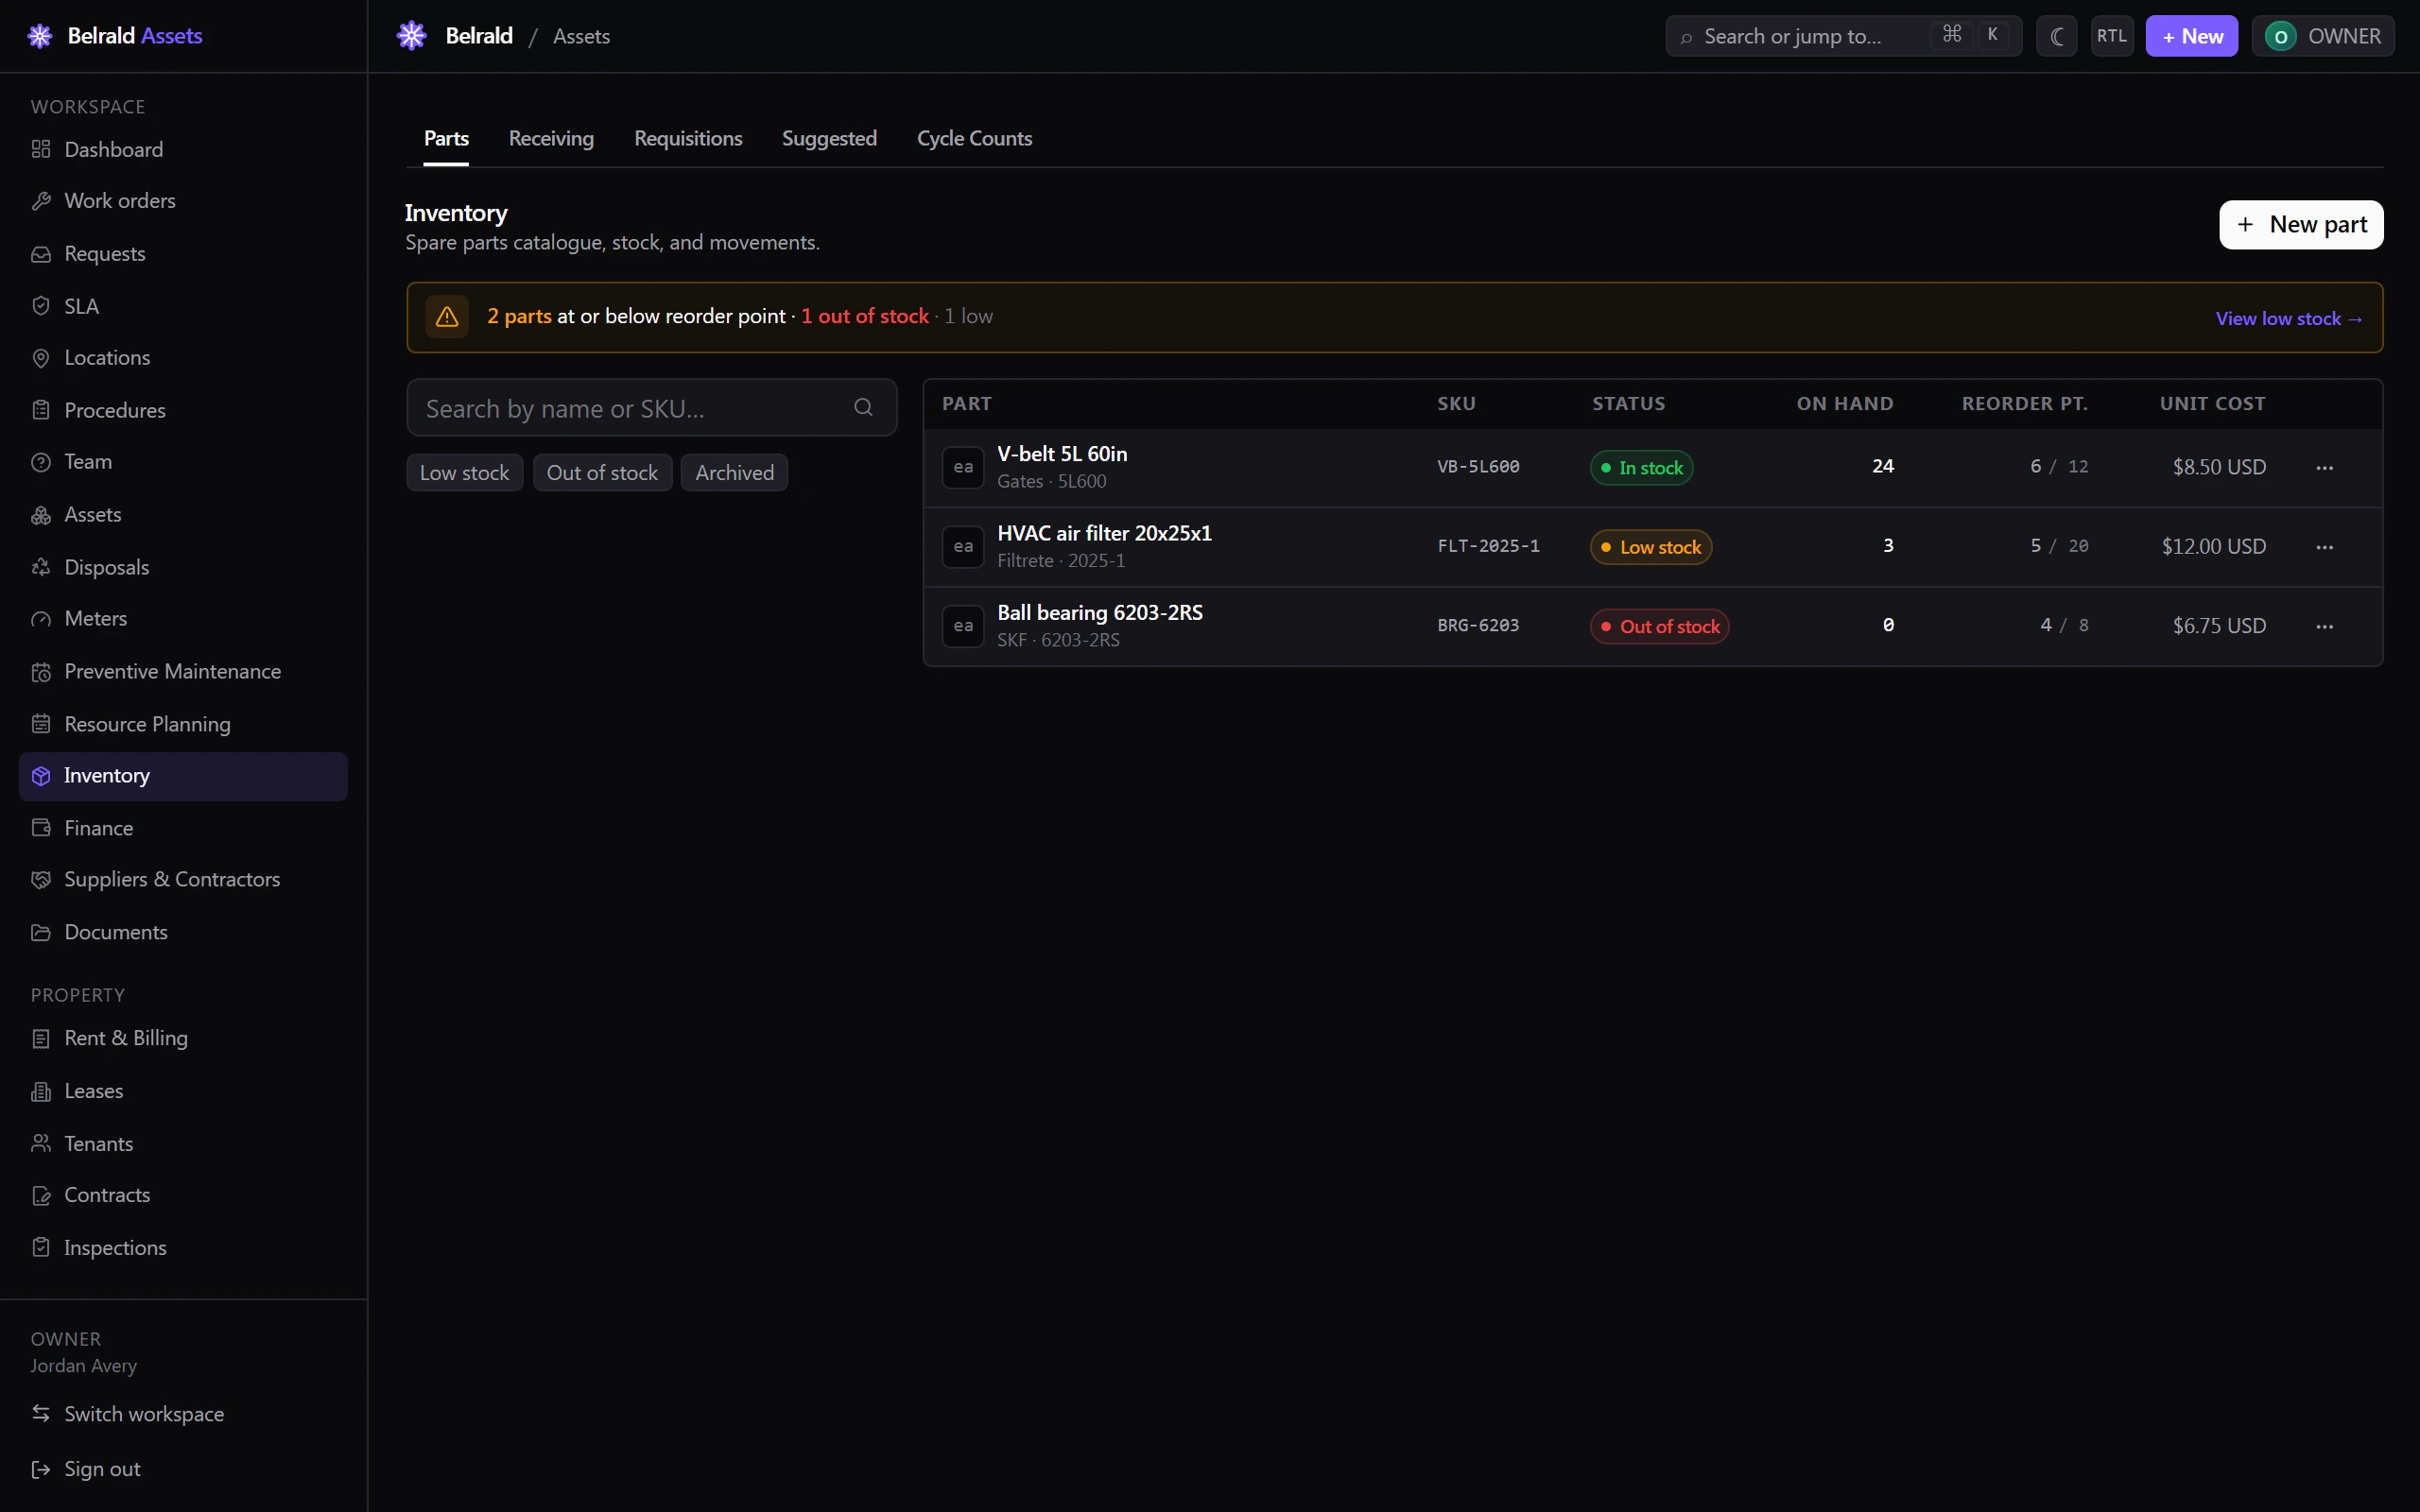
- Each row shows the part’s SKU, a stock Status pill — In stock, Low stock, Out of stock, or Not stocked — the quantity On hand, the Reorder pt., and the Unit cost.
- Use the search box to find a part by name or SKU, or narrow the list with the Low stock, Out of stock, and Archived chips.
- Select a part to open its detail page, which has Overview, Stock, Movements, and Suggested tabs.
A part is Low stock once its on-hand quantity drops to or below its reorder point, and Out of stock at zero. When any part reaches that threshold, a banner appears above the list; select View low stock to filter to those parts.
Add a part to the catalogue
Section titled “Add a part to the catalogue”- On the Parts tab, select New part.
- Enter a SKU and a Name. The SKU must be unique and can’t be changed after the part is created.
- Optionally add a Description, Category, Manufacturer, and Model #.
- Set the Unit of measure (for example,
each), the Unit cost, and the Currency. - Under Reorder rules, set the Reorder point (the on-hand level that flags the part as low stock) and the Reorder quantity (how much to order each cycle). Choose a Reorder methodology — Avg consumption, Lead-time demand, Min/Max, or Economic order qty — and, if you use it, the Lead time (days) and Safety stock (days).
- Optionally record a Primary supplier (Vendor id) and an Image URL.
- Select Create part.
Track stock across bins
Section titled “Track stock across bins”A part’s stock lives in one or more bins — a quantity held at a location.
- Open the part and select the Stock tab.
- Select Add bin, choose the Location, enter the starting Quantity, and optionally a Bin label.
- The table lists each bin’s Location, Bin, and Quantity, with a Σ bins total at the foot.
- To move stock between bins, use the transfer action on a bin row and pick the destination location and quantity.
Adjust or return stock
Section titled “Adjust or return stock”Manual movements cover count corrections and returns. Receiving, transfers, and work-order pulls each have their own path and don’t use this form.
- Open the part and select the Movements tab, then Record movement.
- Choose a Type: Adjusted (any non-zero change, positive or negative) or Returned (must be positive).
- Pick the Bin, then enter the Quantity Δ. The sheet shows the Projected balance so you can confirm the result before saving.
- Optionally add a reason and a Work order id or Asset id for attribution.
- Select Record.
Consume parts on a work order
Section titled “Consume parts on a work order”Technicians pull parts against a work order through the Parts cart. Pulling decrements stock and posts the cost to the work order.
- In the Inventory desk, open the Parts cart.
- In Pulling from bin (stock location id), enter the bin you’re pulling from. Every line in the cart pulls from that one bin.
- Scan or type a SKU to add it as a line, then adjust the quantity on the line if needed.
- Select Confirm pull.
Confirming records a Used movement for each line and reduces the on-hand quantity. When the cart is tied to a work order, the pulled parts roll up onto that work order as a Parts cost, shown on the work order’s cost panel as Added from Inventory.
Was this page helpful?
Thanks — your feedback helps us improve these guides.