

Plan and balance technician workload
Also known as: resource planning, capacity, utilisation.
Resource planning shows how loaded your technicians are, where work is piling up, and how to spread it more evenly. It draws capacity from each technician’s availability and demand from their work orders and projected preventive maintenance, then reports utilisation across three views.
Open it from Resource Planning in the sidebar. The page opens on the Dashboard; a segmented control switches between Dashboard, Calendar and Planner. Everyone with access can read the three views; setting availability, rebalancing work and rescheduling are limited to owners, admins and managers.
The dashboard
Section titled “The dashboard”The Dashboard is the at-a-glance view. Three tiles show team utilisation over the Next 4 weeks, Next 12 weeks and Next 52 weeks. Each tile carries a percentage, a capacity bar coloured by band — on plan, over capacity or critically over — and a breakdown of demand: PM demand, WO load, Leave and Training against total Capacity, all in hours and minutes. A window with no availability set reads No capacity set rather than a percentage.
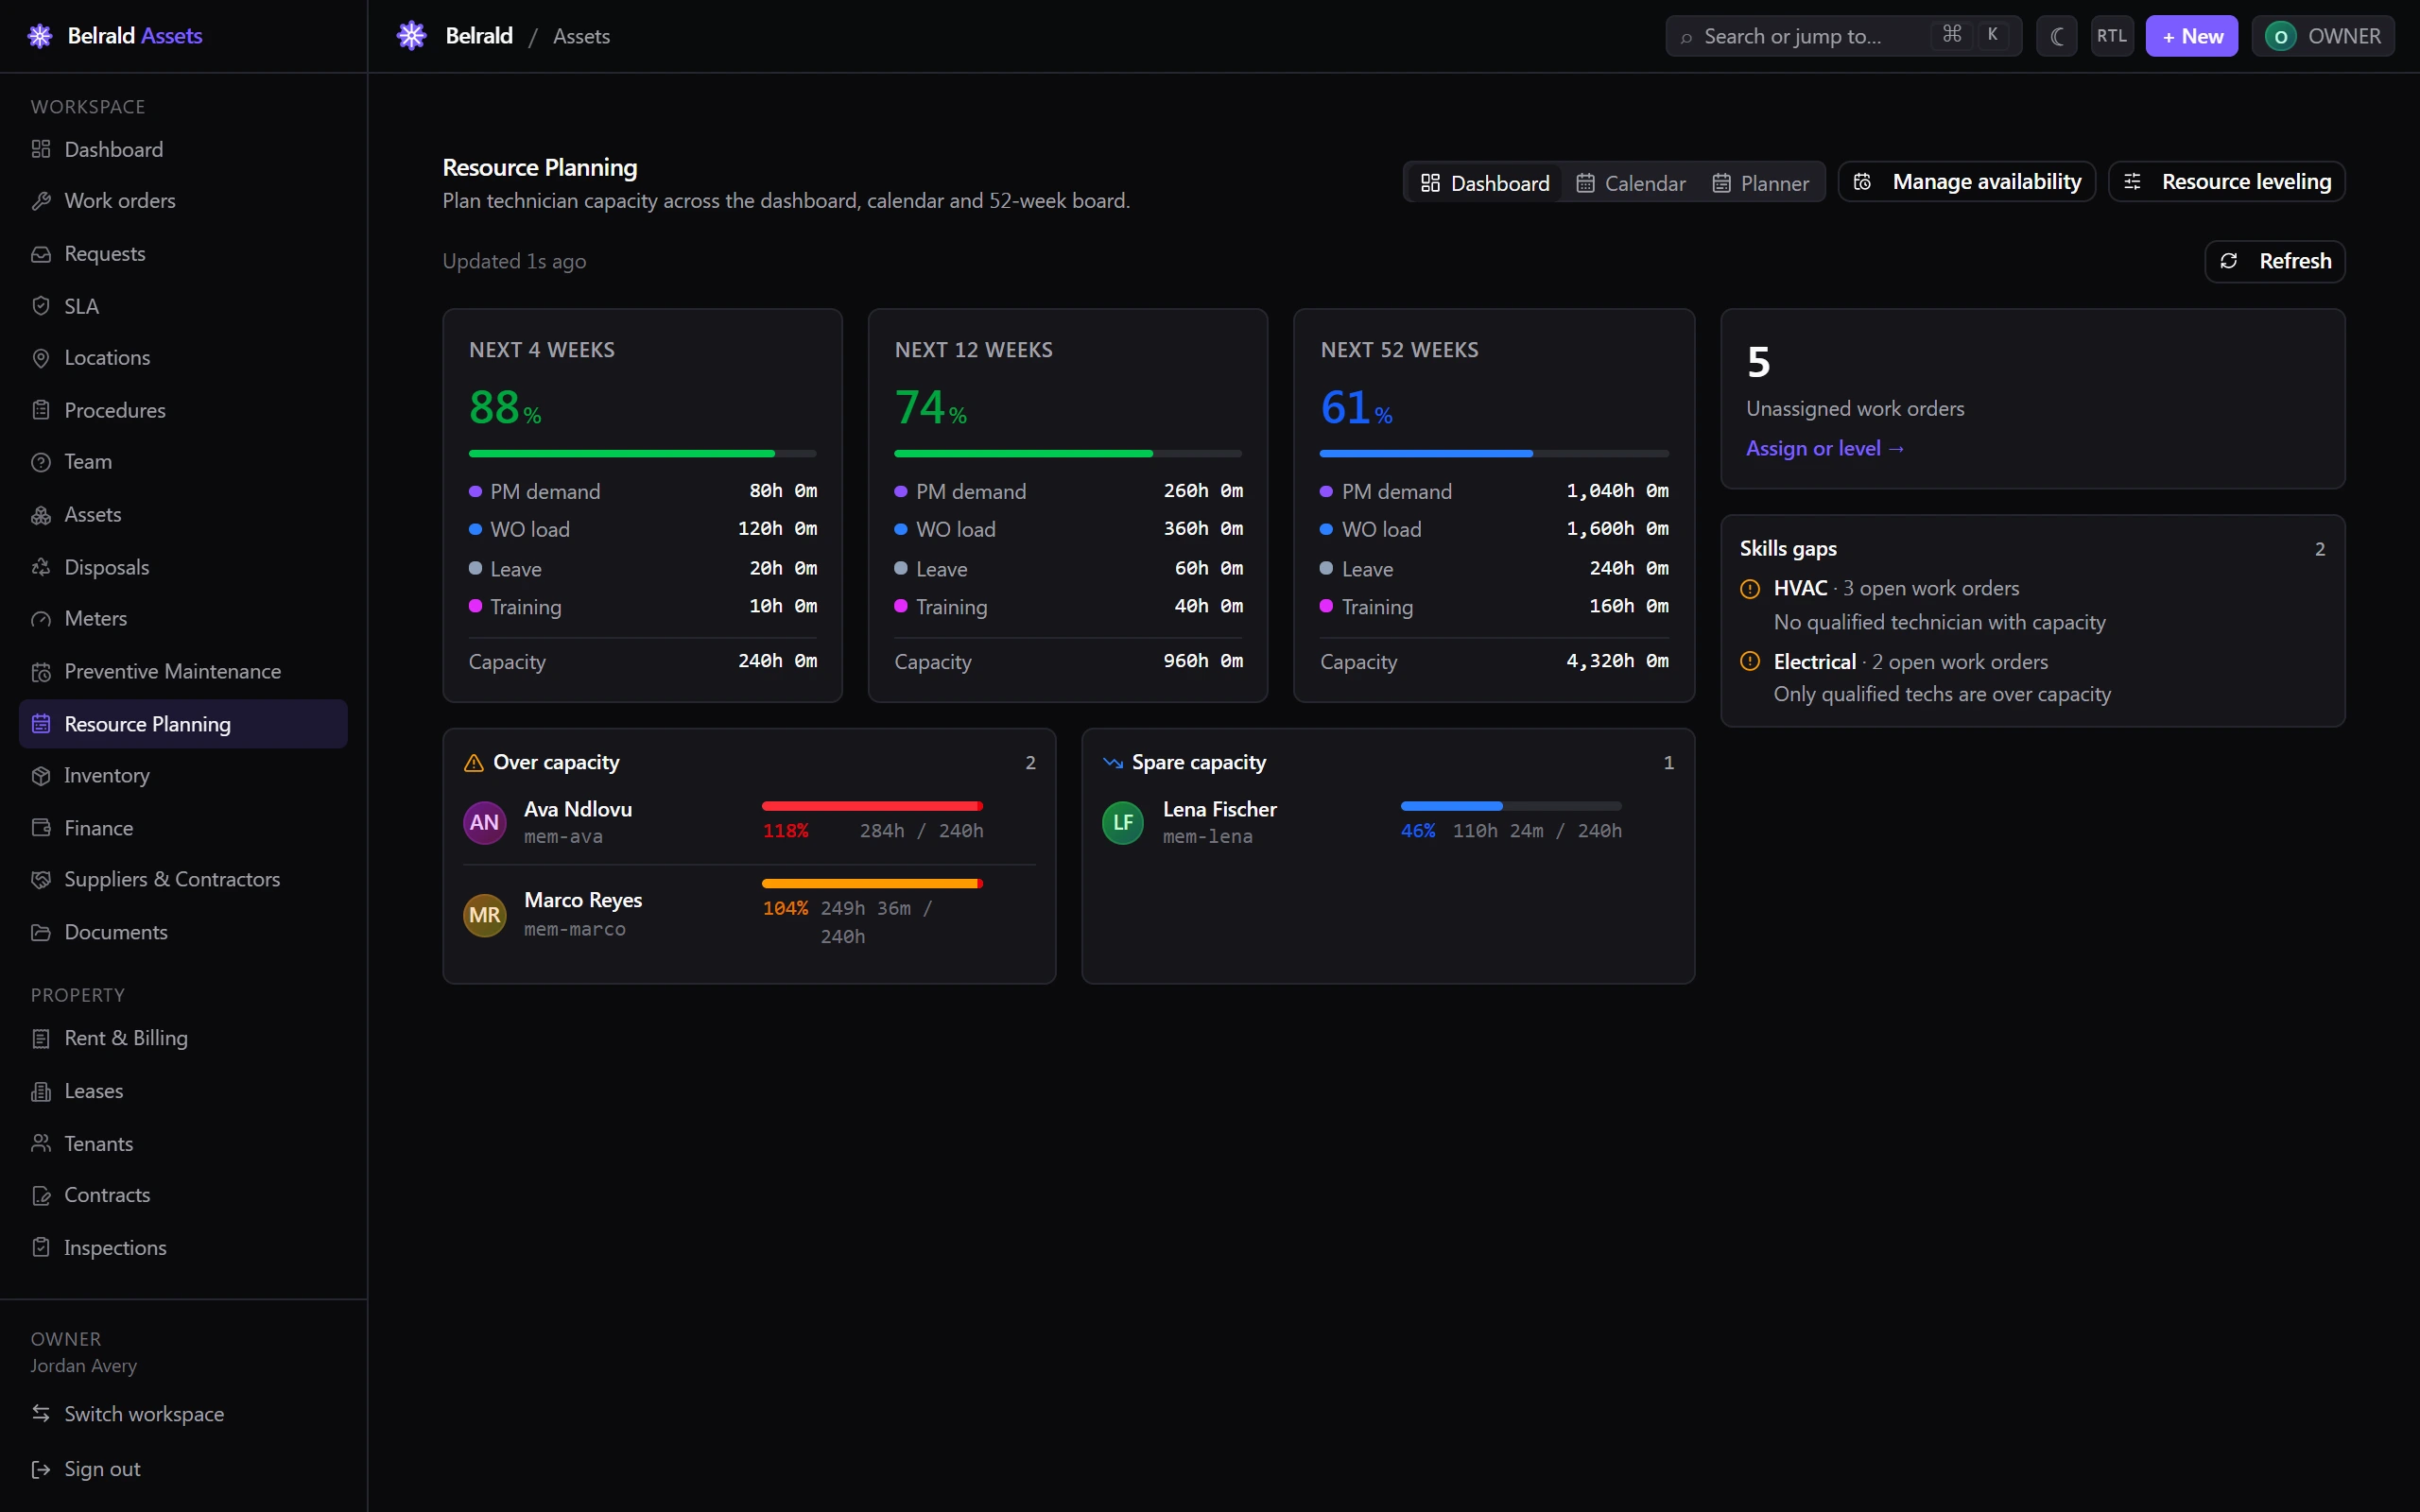
Below the tiles, two lists call out the technicians who need attention: Over capacity and Spare capacity, each row showing the person’s next-4-week utilisation and committed-versus-capacity hours. A right-hand rail shows the count of Unassigned work orders — select it to jump to those work orders — and a Skills gaps panel that flags categories with open work but no qualified, available technician.
Use Refresh to recompute; a small line notes how long ago the figures were generated and whether they came from cache.
The calendar
Section titled “The calendar”The Calendar lays out scheduled work per technician across a Day, Week or Month window. Use the arrows to step the window backwards or forwards. Blocks are colour-coded by kind — work order, PM projection, leave, training, travel or hold — and each day shows committed time against that day’s capacity.
If you can reschedule, drag a work-order block to another day or technician to move it — or select a block and use the arrow keys. Projected PM occurrences and completed or cancelled entries are read-only: projections rebuild from the PM schedule, so edit the schedule instead. On a phone the calendar becomes a scrolled agenda list.
The planner
Section titled “The planner”The Planner is a longer-horizon capacity board — 52 weeks by default. Toggle By technician or By week, and each week column shows load against capacity. Select Export CSV to download the weekly figures, or Refresh to recompute.
Set technician availability
Section titled “Set technician availability”Availability is what turns demand into a utilisation percentage — without working hours, a technician reads as No capacity set.
- Select Manage availability in the header. You can also reach the editor from the dashboard’s Add availability prompt, or from the pencil on a technician row.
- Choose the Technician if one isn’t already selected.
- Step to the Week starting you want to set. Weeks start on a Monday.
- For each day, tick Working and set the Start and End times. Each day shows its resulting hours.
- Enter Planned leave and Planned training for the week, in minutes.
- Check the Effective capacity total — it updates live as you edit.
- Select Save availability.
Balance the team with resource leveling
Section titled “Balance the team with resource leveling”Resource leveling previews a set of reassignments that even out load, then applies them in one go.
- Select Resource leveling in the header.
- Set the Scope — a From and To date, and optionally a location and specific technicians. Leaving those blank covers All locations and All technicians.
- Choose a Strategy:
- Balance utilisation — even out load across the team.
- Minimise overage — just bring everyone to capacity or below.
- Respect priority first — keep high-priority work on the best-fit technician.
- Select Preview plan. The result lists proposed Reassignments and any Skipped work orders, each with a reason — pinned to its assignee, no qualified candidate, certification expired, outside service area, or missing a required skill.
- Review the plan. Editing any scope or strategy field clears it so you never apply stale suggestions.
- Select Apply reassignments and confirm. Reassignments apply all-or-nothing and the affected assignees are notified.
Suggest an assignee for a work order
Section titled “Suggest an assignee for a work order”When you assign a work order, resource planning can suggest the best-fit technician. In the work order’s assign panel, the Suggested assignee section offers a Suggest button; it returns a technician, a Match score and a short reason. Select Use suggestion to apply it, or, if no one fits, follow the link to open resource leveling. The suggestion augments the manual picker — it never replaces it — and only appears when resource planning is enabled.
Was this page helpful?
Thanks — your feedback helps us improve these guides.